
By Roberta Gibson
You have probably encountered mealworms some time in your life, although you may not have known what they were. Perhaps Grandma fed them to her chickens or Uncle Joe used them for bait when fishing. Mealworms are also used for food for pet reptiles, wild birds and people. But did you know that they also have potential for science projects? Mealworms are easy to obtain, easy to take care of, don’t take up much space and lend themselves to many simple experiments.
Mealworm Facts
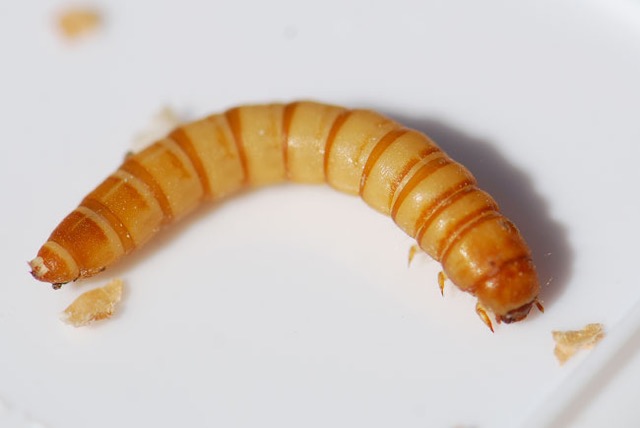
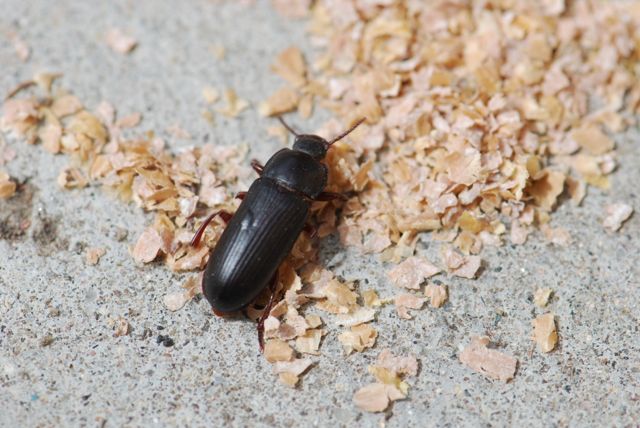
Mealworms get their name from the fact that they feed on meals and flours, such as oatmeal, cornmeal or wheat products. The mealworm itself is an elongate yellow-brown cylinder with six small legs right behind its head. It is the larval or immature stage of a dark brown to black beetle in the family known as darkling beetles.
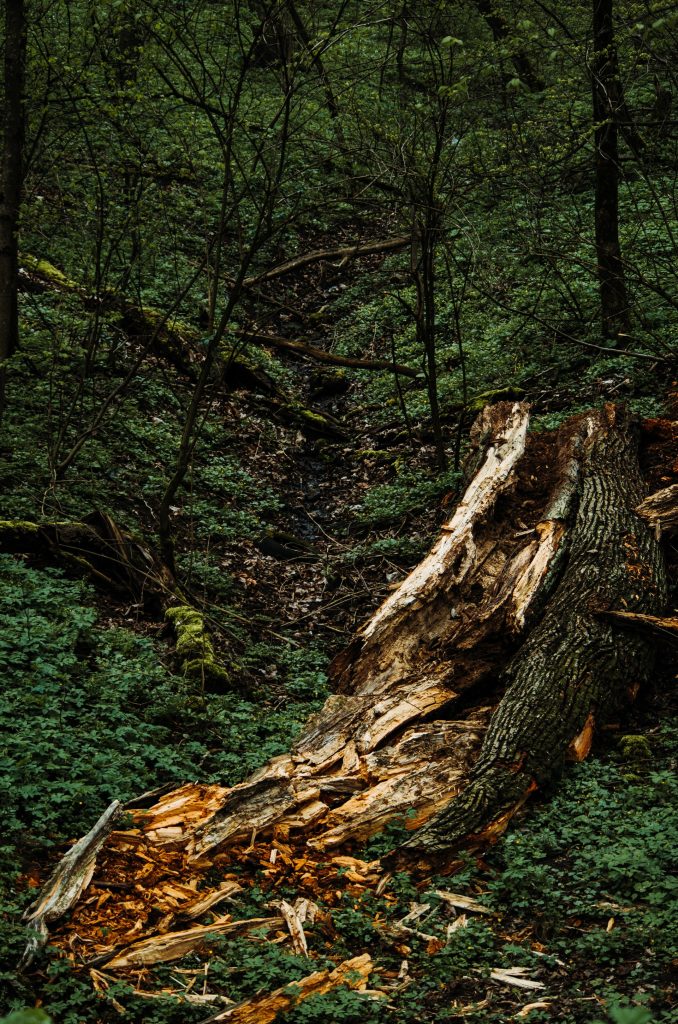
Three kinds of mealworm are available commercially. The most common is the yellow mealworm, Tenebrio molitor. You may also find the dark mealworm, Tenebrio obscurus, or the giant or king mealworm, Zophobas sp. Related species of darkling beetles feed in rotting logs or in leaf litter. Another genus of darkling beetles (Elodes) is common in deserts. These beetles are also called stink beetles because they stand on their heads and spray chemicals at potential enemies.
Where to Get Mealworms
Because they are so nutritious as pet food, most pet stores will probably either have a supply of mealworms or will know where you can find them locally. You may also order from companies such as Fluker’s, Rainbow Mealworms or biological supply companies such as Carolina Biological Supply or Wards and of course Amazon.
Note: king mealworms are sometimes treated with a hormone to prevent them from molting into a pupa. Check with your supplier before purchasing.
You may either order as many as you need to complete your experiment, or you may want extras to try a rearing/husbandry project.
Rearing Mealworms
For rearing dark or yellow mealworms you will need a tub or container, some food, a source of moisture and a substrate for the adults to lay eggs. If this is a small project, a clear plastic cup or a margarine tub with a cover will do. Poke small holes in the lid for ventilation with a pin or brad, or remove a quarter-sized hole and cover with screen. Glue the screen in place with a glue gun.
Fill the container about one quarter full with wheat bran, crushed wheat cereal, oatmeal, oat bran or corn bran, or a mixture. You can also mix in dry cat food or chicken laying mash, if available. Add a few small slices of apple or potato on top — for moisture. Change the slices regularly. If you notice the flour is molding underneath the slices, lay them on a bottle top or other lid. Add a piece of crumbled cork or crumpled paper for the adult beetles to lay their eggs on. Add the larvae and store in a warm (80 degrees F) dark place.
After a few weeks, the larvae should change into something that looks like a soft, immobile beetle. This is the pupal stage. The hard-shelled adult beetle will emerge in 10-20 days. Leave the adults right in the container. They should lay eggs and you will have tiny larvae in a few weeks.
Add more food and remove larvae for experiments as needed. Eventually the mealworms will benefit from a thorough cleaning. Dump the contents into a tray, separate the larvae and pupae from the food, clean the container, add fresh food and return the larvae to their new home. If you don’t like to pick up the worms with your fingers, try a small plastic spoon.
If your pupae start disappearing or have holes in them, the larvae might be feeding on their sisters and brothers. Remove the pupae to a separate container if that’s the case. The bigger king mealworm should probably be raised in individual containers because of this problem.
Activity:
When you first receive the mealworms, take the opportunity to allow the children to observe them closely. Supply a hand lens, ruler, and some paper in case they want to draw or record what they see. Talk about their observations and what questions they have. The books in the references should answer some of their questions.
Experiments
Here are three simple experiments using mealworms. You can probably think of many more once you get started.
A. Light versus Darkness
1. To see if mealworm larvae prefer light or dark.
Gather:
◆ Black paper
◆ Clear plastic
◆ Tape
◆ Notebook to write down your results
◆ Mealworms
◆ Paper plate
◆ Mealworm food
2. Prepare a paper plate by covering the surface with a small layer of mealworm food, but not so deep that the mealworms can burrow under and hide. Place the mealworm on the plate in the center, then cover half the plate with the black construction paper and half with clear plastic. Tape down to hold in place, if needed. leave in a well-lit location. After 15 minutes, check whether the mealworm is on the light or dark side. Return it to its home container.
3. Repeat with several mealworms. To increase accuracy, place a new mealworm in the dark side first. Rotate back and forth. Also use clean plates and food in case the mealworms prefer to go where they smell other mealworms. Or design an experiment to see whether they do prefer the area that previously held a mealworm.
B. Diet Tests
1. Prepare several similar containers with different foods, such as wheat flour and bran in one cup, corn meal and bran in another, and oatmeal and bran in a third. Give all the cups either potato or apple slices, and keep all other conditions the same.
2. Add the same number of similar-sized larvae to each container.
3. Record either how fast the larvae become adult beetles or how many adult beetles are formed or both to determine which diets perform best.
C. Compare Life Cycles of Species
1. Obtain two or three species of mealworm, and practice rearing them in individual containers. When you have adults laying eggs for all species, begin the experiment.
2. Prepare new containers with exactly the same diet and conditions. Add a fresh paper to the rearing container overnight to obtain freshly laid eggs. Cut out the individual eggs and add one to each prepared container. Label the species of mealworm on the container. Set up a similar number, such as ten, for each species.
3. Keep the containers together in the same location so the conditions stay as uniform as possible. Record how fast the larvae emerge, when they pupate and when new adults emerge. Which species has the quickest life cycle? Which is the slowest?
Other experiments include checking to see if adult beetles prefer laying eggs on paper, cloth or cork.
Happy beetling!
Roberta Gibson worked for a number of years as an entomologist before she caught the writing bug. Her debut picture book “How to Build an Insect” was released in April 2021. You can visit her at https://robertagibsonwrites.com/ , Growing with Science Blog, Twitter @RobertaGibson, or Instagram @RobieGibson.
References:
Enchanted learning has a mealworm life cycle illustration
From Mealworm to Beetle: Following the Life Cycle by Laura Purdie Salas (Author), Shelly Lyons (Editor), Jeffrey Joseph Yesh (Illustrator)
Mealworms: Raise them, watch them, see them change by Adrienne Mason (Author), Angela Vaculik (Illustrator)
Copyright August 2001, May 2021
Originally published in September/October 2001 issue of HELM (Home Education Learning Magazine)